

When I first put rooftop solar meter systems on my own roof in India, I honestly believed my electricity bills would disappear overnight. That’s not how it works.
Most homeowners who go solar stay tied to the grid, so any excess power their grid-connected systems produce either gets credited, stored in battery storage, or simply lost as wasted excess electricity.
Whether you gain or lose from that exported power depends on the metering mechanism your distribution company follows, and that single fact matters as much as picking a good solar inverter or quality solar panels.
Across the country, residential customers and commercial customers are turning environmentally conscious, chasing a smaller carbon footprint and cleaner electricity generation through green energy and renewable energy.
Solar energy itself is only half the story the other half is billing.
Three billing paths dominate this space net metering, gross metering, and net billing and each one decides how much you get compensated for the units you send back.
The DISCOM policy in your region sets the terms for energy credits, and that utility billing mechanism shapes your payback period and your return on investment far more than most people realize.
Modern smart solar technologies such as Enphase now offer real-time tracking and real-time consumption dashboards, which support battery usage optimization and let you watch net energy used against power consumption across each cycle, so you always know where your DISCOM stands with you.
What Is Solar Meter?
A net metering setup runs on a simple idea: your home uses the power your solar system makes first, and only the leftover solar power generated heads out to the grid.
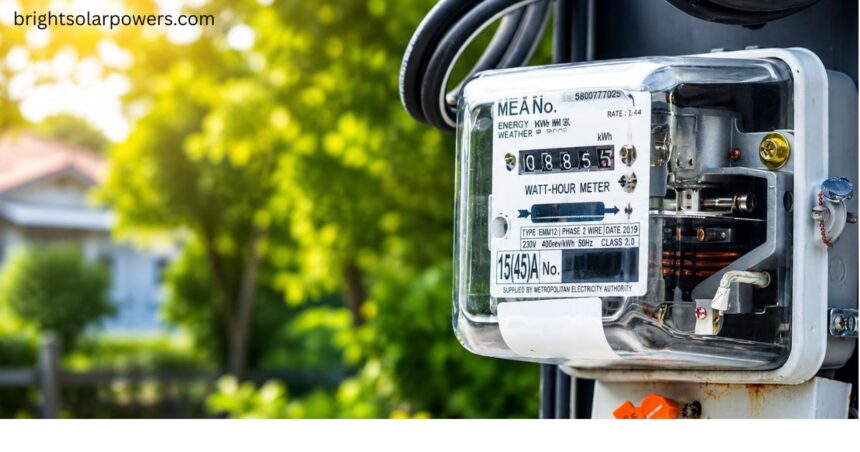
A bi-directional meter sits at the center of this utility billing arrangement, quietly recording every unit you import from the grid and every unit you export to it .
During the day, while most people are at work or kids are at school, houses see low occupancy, so daytime generation often outpaces what’s actually needed, creating unused daytime surplus that would otherwise go to waste.
Instead, that surplus generation gets tracked and turned into credits, which are later applied against electricity drawn from grid at night when the sun is down.
Over a full billing cycle, the utility works out the shortfall between what you drew and what you sent, and that’s the number you actually pay for which is exactly what net energy used means in practice, and it’s the whole reason a home with solar rarely faces a full retail-rate bill for its electricity.
How Net Metering Works ?
I like to explain this with plain numbers rather than jargon, because the worked example always makes the compensation structure click faster than theory alone.
Say a residential installer sets you up with a bi-directional solar meter and your household exports 1,000 units while pulling in 1,200 units over one month; with a grid rate of ₹8/unit as the retail price and an export rate of ₹3/unit, offsetting consumption brings your bill down to just ₹1,600 for the total imported minus total exported balance.
Some utilities run on a 1:1 tariff, matching every exported unit against the same tariff charged for import that’s a full credit, and it’s the best outcome you can get. Others apply a lower rate for what you send back, so your savings shrink even if your kWh numbers look identical.
Credit settlement can happen monthly, annually, or on a rolling basis, and unused credit is usually carried forward into a future month rather than lost so if you generate 150 kWh but use only 100 kWh, that gap doesn’t vanish, it waits for you.
Every utility sets its own net units rule, which is why it pays to read the fine print before assuming your net metering deal matches your neighbor’s.
Gross Metering
Gross metering flips the whole idea around: every unit your panels make is treated as exported to grid, none of it touches your home consumption directly, and you keep buying all your power from the utility at normal cost.
A uni-directional export meter replaces the bi-directional net meter here, tracking only total solar units sent outward, and in return, you’re paid solar meter feed-in tariff rather than getting a bill offset.
This setup usually kicks in once your system crosses a sanctioned load limit, which many state policies enforce, pushing larger installations away from net metering eligibility and into this fixed-payment lane instead.
It tends to suit commercial users and institutional users who want to monetize spare rooftop space or generation capacity rather than cut their own usage, since there’s no direct bill reduction for the household or business itself.
Running the same numbers as before 1,200 units consumed at retail rates, plus 1,000 units sent out at ₹2-3 per unit leaves you paying ₹9,600 for all power sold while earning back only ₹3,000, for a final cost near ₹6,600, since export tariffs sit well lower than retail pricing.
Several regions apply this exact fixed rate approach through their state policy, and it’s worth checking local solar generation rules before assuming gross metering suits your goals.
Net Billing
Net billing sits somewhere between the two models above, working as a genuine hybrid model where you enjoy self-consumption during sunny solar meter hours and get paid separately through a surplus export for whatever spills over.
Here, units consumed get charged at standard retail rates the usual retail tariff your DISCOM sets while units exported earn a completely different feed-in rate, often called the sell rate, rather than the same price you pay to buy power, which economists sometimes label the buy rate.
The math behind your final bill formula simply subtracts exported value from consumed cost: multiply what you used by the retail tariff, then subtract exported units times the export rate.
Running our earlier figures through this formula produces the same ₹6,600 outcome as gross metering, since both rely on a fixed rate for outgoing power rather than a straight 1:1 swap, and that gap explains the lower savings many net billing customers report versus true net metering.
A handful of utilities sweeten the deal by solar meter paying a better feed-in tariff during peak hours, so it’s worth asking your local grid electricity provider whether that option exists before you sign up, since the financial benefit can shift noticeably depending on timing.
Benefits Of Solar Meter
Ask any solar owner what changed after installation, and bill savings usually top the list, since retail-rate net metering can wipe out most energy charges for a well-sized system over a full year.
A properly sized system also shortens the payback period, since regions offering strong local incentives and full-value crediting help owners recover their installation cost faster than markets without such support, and system size solar meter plays a bigger role here than most first-time buyers expect.
Beyond the wallet, there’s a genuine environmental benefit: less grid dependence from solar households eases pressure on utility infrastructure, and surplus units flow onward to other users instead of straining the network further, cutting down on fossil-fuel power reliance and easing reduced grid strain across the wider system.
Net metering also removes the need for a virtual battery substitute in the form of costly physical storage skipping a battery.
Backup cost that can run past $12,000 or even $14,000 for a full setup because the grid itself absorbs and returns your surplus renewable energy value automatically, letting your existing battery storage, if you have any, stay smaller and cheaper.
Limitations
No system is perfect, and net metering carries a few catches worth knowing upfront before you sign anything. Credit policies shift from place to place, so DISCOM variation and outright state variation mean you can’t assume 1:1 solar meter compensation just because a friend across town got it, and compensation policies for the same metering type can differ sharply between neighboring districts.
Fixed charges on your electricity bill almost always survive regardless of how much solar you generate, and correct system sizing relative to actual usage determines whether your savings meet expectations or fall short.
Since every local distribution company writes its own utility rules, a quick installer consultation before signing up saves a lot of confusion later, and I’d genuinely recommend treating that conversation as mandatory rather than optional.
Checklist & Documentation for Net Metering Approval
Paperwork trips up more solar applications than actual wiring does, so having a clear checklist saves real time at the distribution company counter.
Standard requirements typically include an interconnection agreement between the distributed generator and the utility, a standard application form, a license application filed with the regulatory authority, and, where relevant, an exemption request tied to specific rules such as those under NEPRA.
You’ll also need a clear fee structure acknowledgment, a notarized affidavit, a license generation template, an attested copy of your national ID, and a bill showing the correct applicant name matching your account.
On the technical side, expect to submit technical specifications for your solar modules and inverters, a schematic diagram, a single-line diagram, and a site plan marking the external disconnect switch.
Larger installations, generally above 250 kW, usually require an electrical inspector certificate along with a full load flow analysis and a completed electrical installation inspection before final sign-off.
Net Metering Installation Process (India)
The real-world process is fairly consistent nationwide, though small details shift state by state, so I always tell people to double-check with their local divisional officer first.
It starts with application submission, after which a junior engineer visits for site inspection and gives the go-ahead for solar system installation; once that’s done, you submit property documents, a net metering fee, solar system certificates, and installation certificates from your installer.
A follow-up verification visit confirms everything matches the MNRE guidelines, covering the earthing datasheet, test report documents, and correct ACDB and DCDB wiring, before the utility finally issues and fits the net meter issuance.
Some regions even allow a market purchase of an approved meter from a recognized company rather than waiting on the utility, provided property ownership is confirmed beforehand.
Approval timelines vary a lot states like Gujarat and Rajasthan often clear applications within 10-15 days thanks to smoother processes, while others take longer if a load increase application is needed because your sanctioned load was exceeded.
Testing costs and overall installation cost typically land somewhere between ₹10,000 and ₹15,000, covering both labor and equipment checks.
State-Wise Variation in Metering Policy
Solar rules genuinely change shape as you cross state lines, and this DISCOM variation catches a lot of first-time buyers off guard.
Some regions rely on a single meter to track net usage, while states with heavier solar generation volume, such as solar meter Maharashtra and Delhi, often require a dual meter setup to separately record total grid draw against total generation.
Uttar Pradesh, by comparison, has historically leaned on simpler single-meter tracking given lighter solar uptake in earlier years.
A handful of states have shifted toward a gross-metering policy instead, paying a fixed rate around ₹2-3 per unit for exported solar rather than netting bills directly.
As India pushes toward its 100GW milestone, providers like Waaree have compiled state-specific resources covering each region’s state policy, and I’d strongly suggest a proper installer consultation before assuming your state follows the same rulebook as a neighboring one.
How to Identify and Read a Net Meter?
Spotting a genuine net meter is easier than most people assume once you know what to look for. Check the meter glass or meter housing for a net meter label, often shown as an NM marking stamped right on the unit; if nothing’s visible, a quick call to confirm gets you utility confirmation in minutes.
A true net meter cycles through numbered readings, usually marked 0 through 5, though only the first three really matter day to day: reading 1 shows your production reading, reading 2 reflects consumption reading, and reading 3 gives the net difference reading for the current cycle, while 4 and 5 mostly track 24-hour usage and rarely change.
Watch the directional arrows too one points toward drawing from grid when you’re consuming, the other points toward sending to grid when you’re producing more than you use.
During early morning reading and evening consumption hours, the arrow usually leans toward drawing power, while midday production flips it the other way as panels hit peak output.
It’s worth remembering that a plain one-directional meter won’t show a backward spin or falling digital numbers even when you’re overproducing, solar meter which can leave you double charged if it’s mistaken for a proper net meter .
Understanding the full display cycle and general power flow through billing cycle tracking genuinely protects your wallet and pushes your monthly balance closer to net zero.
Getting Connected Permit & Utility Sign-Off Process
Getting from decision to working system involves more than bolting panels to a roof, and I learned this firsthand navigating my own permit submission.
The typical path runs through an electrical permit, followed by utility approval for your proposed system design, then actual system build, and finally utility review of the completed work before the utility schedules meter installation and has you sign a tariff agreement.
Not every provider offers the same deal some run a reduced per-unit rate, others quote no net metering option at all, so confirming terms with a grid-tied system in mind before you commit saves headaches later.
Homes without a battery backup stay fully dependent on the grid during a power outage, which is why I keep a backup generator on hand to cover essential loads when the lines go down.
Going the self-installed system route, skipping any extra install fee, brought my own payback estimate down to roughly 3-5 years, noticeably faster than paying a contractor for the same residential solar build.
Under a strong 1:1 credit deal, monthly bills can settle near $14 to $15 per month, a sharp drop from the $200 to $300 per month many households pay without solar at all.
Why does it sometimes take a long time to get net metering approved after applying?
States with a genuinely favorable policy, like Gujarat and Rajasthan, tend to clear these installation issues faster, often within 10-15 days, simply because their overall state efficiency in processing applications outpaces other regions, cutting down the usual approval delay most applicants brace for.
General Process For Installing Solar Meter
The journey runs from initial application submission through pre-approval, followed by site inspection and full system installation; once the physical work wraps up, you submit property proof, pay the required fees, and hand over supporting certificates for review.
A final inspection then confirms everything meets code before the utility completes net meter installation, at which point net meter issuance happens and your documentation submission file gets closed out for good.
How much does a net meter installation cost?
Across most of India, total installation cost including equipment and testing generally falls between ₹10,000 and ₹15,000, though regional variation means some states or utilities may charge slightly more depending on local labor and inspection fees.
Why might an electricity bill increase after a net meter is installed?
A sudden spike usually points to a billing error rather than a real problem with your system, since your bill should only reflect net energy rather than your full total consumption. Once you flag it through a proper utility complaint covering the missing exported units, most providers issue a bill correction fairly quickly.
Does net metering policy vary by state/region?
Absolutely some regions run gross metering with a single meter, others stick with true net metering and a dual meter arrangement, and the eligibility solar meter threshold tied to your sanctioned load often decides which path applies. Even the compensation rate you’re offered can shift depending on your local state policy and your DISCOM’s specific rulebook.
How can I tell if I have a net meter?
Look for a clear net meter label or an NM marking printed on the meter housing itself; if you can’t spot either one, a short call for utility company confirmation clears up the question in minutes.
Will a regular (non-net) meter run backward when my solar system overproduces?
No, it won’t a standard one-directional meter simply keeps consumption counting upward regardless of whether you’re using or generating power, solar meter so it never shows a genuine backward spin. That’s exactly why relying on the wrong meter can leave you paying for both consumption and production at once, a costly mix-up known as double charging.
FAQS about Solar Meter
What is a solar meter?
A solar meter is a device that measures the electricity your solar panels produce. It gives you an honest, real-time record of your solar energy generation.
How do solar meters work?
The solar meter connects to your solar panel system and tracks the power created from sunlight. It measures these units continuously, showing your system’s true performance.
Difference between solar meter and net meter?
A solar meter measures only the electricity produced, while a net meter tracks the balance between what you generate and consume from the grid. This small difference can meaningfully affect your savings and credits.
Where is the solar meter installed?
The solar meter is placed near your main electric panel, at the point where your solar system joins the grid. It’s kept in an easily accessible spot for quick, worry-free checks.